

Summary: Outlook 365 is an Office 365 product and a cloud-based email client that works with Exchange online. It offers several features and advantages over the standalone Microsoft Outlook version for Windows and Mac, such as better security, secure cloud storage, compliance protection, automatic upgrades, etc. In this guide, we’ve discussed a manual and an automated method to help you import OST files into Outlook 365 accounts.
OST or Offline Storage Table, also known as Offline Outlook data file, is used to store an offline copy of Exchange mailbox items. Unlike PST, you can’t import an OST file into Outlook 365 as the file is encrypted with the MAPIEntryID GUID key.
Although you can export the mailbox items from an OST file to PST format via Outlook Import Export wizard, the problem arises when the OST file is orphaned or inaccessible. It means the OST files that belong to a deleted or disabled Exchange mailbox profile.
However, you can extract the mailbox items from inaccessible or orphaned OST files and export them directly to Outlook 365 account by using an OST to PST converter software, such as Stellar Converter for OST. The software also helps you convert multiple OST files simultaneously to corresponding PST files that you can import into Outlook 365 accounts.
Table of Contents
Methods to Import OST File into Outlook 365
Below are the two methods to import mailbox items from an OST file into Outlook 365 with 100% integrity and without the risk of any data loss.
Method 1: Convert OST to PST and Import the PST into Outlook 365
This method is divided into two steps. First, you need to convert the mailbox items from OST to PST by using Outlook Import/Export wizard. Then import the converted PST file into Outlook 365 account.
NOTE: This method works when the Outlook profile and OST file are in sync with the mailbox on the server. This method won’t work if the Exchange server is offline or the Outlook profile is not connected to the server. In such a case, you can follow the next method to convert and import the OST file into Outlook 365.
Step 1: Export OST to PST via Outlook Import/Export Wizard
- In Outlook 2007, navigate to File > Import and Export.
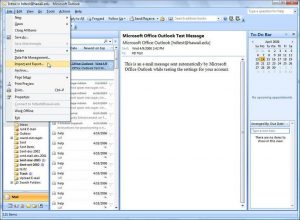
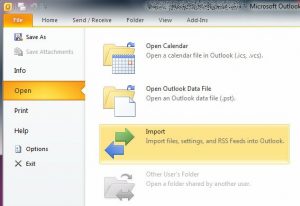
- In Outlook 2010, navigate to File > Open > Import.
- In Outlook 2013 and later versions, navigate to File > Open & Export > Import/Export.
- Choose Export to a file and then click on Next.
- In Outlook 2007, choose Personal Folder File (.pst) and then click Next.
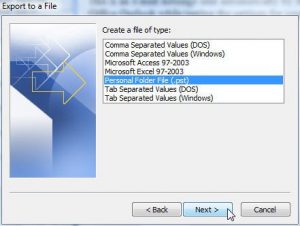
- In Outlook 2010 and later, select Outlook Data File (.pst) and then click Next.
- Select the desired email folders you want to import into Outlook 365. Also, click the Include Subfolder checkbox and then click Next.
- Click Browse to choose a save location and click the “Replace duplicate with items imported” checkbox. Then click Next.
- Enter a password (optional) and click OK. This will convert and save OST mailbox items in a PST file.
Step 2: Import Converted PST file into Outlook 365
Now you can import the converted PST file, containing OST mailbox items, into your Outlook 365 account via the Office 365 Admin Center. However, you must assign the Mailbox Import Export Role to the user account before you can import the PST file.
To assign Mailbox Import Export Role, follow these steps:
- Log in to your Office 365 admin account and then navigate to Admin > Admin Center > Exchange.
- Click permission > admin roles and then click + sign to assign a new role.
- Enter the role name as ‘Import Export’ and then click the +
- Select the Mailbox Import Export and then click Add > OK.

- Now click on the + sign below Members: to choose a user account to whom you want to assign the Mailbox Import Export role.
- Click Add > OK and then click Save (on the previous window).
Wait for an hour for changes to take effect. However, it may take up to 24 hours for changes to take effect.
Now you can import the converted PST file into Outlook 365 account via the Office 365 Admin Center.
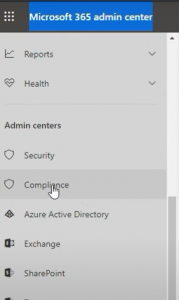
- In Admin Center, click Compliance. This opens a new tab (browser window).
- Click ‘Information governance > Import’.
- Then click ‘Import PST Files’ and then click New Import Job.
- Enter the job name (in lowercase with no space) and then click Next.
- Select Upload Your Date and then click Next.
- Click Show Network Upload SAS URL and copy the URL in your Notepad.
- Then download the Azure Storage Explorer tool and install it.
- Open the Azure Storage Explorer tool and then right-click on Storage Accounts > Connect to Azure storage…
- Choose Use a shared access signature (SAS) URI and then click Next.
- Now paste the SAS URI from Notepad to URI section and click Next.
- Click
- Now click Upload > Upload Files…
- Click … and select the converted PST file. Choose Destination directory and then click Upload.
- After uploading the converted PST file, you need to create a CSV file by using MS Excel. This will help map the PST file to the Outlook 365 mailbox account where you want to import the mailbox data.
- In the Import data window, click both the checkboxes and then click Next.
- Now click Select Mapping file and choose the CSV file. Click Validate to check the file and then click Save.
- Your PST file will be mapped to the Outlook 365 account. Click Close.
- Click Refresh to check if the analysis is completed.
- Double-click on the job name and then click Import to Office 365.
- Choose ‘No, I want to import everything’ and then click Next.
- Click on the ‘Import data’ button.
- The data will be imported successfully. Click Close.
At this stage, you have successfully imported the converted PST file into your Outlook 365 account. If you have multiple OSTs to import, you will be required to export each into a PST file and then perform the manual steps described above to import the PST file.
To shorten this process and import the OST file into Outlook 365 directly, you can follow the next method.
Also Read: Microsoft Discovered A Bug In Windows 10 That Affects Two Security Features Of The Operating System
Method 2: Import OST File into Outlook 365 Directly
To import the OST file into Outlook 365 directly, you need Stellar Converter for OST software. This advanced OST to PST converter software can extract the mailbox items, such as emails, contacts, attachments, calendars, notes, etc., from an OST file and export them directly to your Outlook 365 account. All you need is valid credentials of the destination Outlook 365 account. There is no need to assign special roles and permissions to import the OST file into Outlook 365.
The steps are as follows:
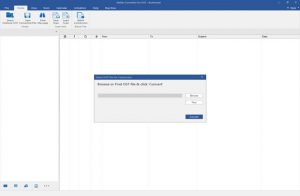
- Download and install Stellar Converter for OST – Technician software on your system.
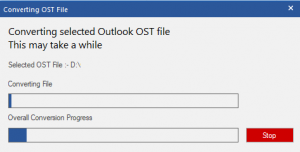
- Click ‘Browse’ to select the OST file and then click ‘Convert.’
- After converting the OST file to PST, the software displays a message. Click ‘OK’.
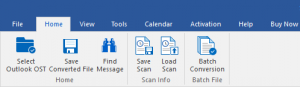
- Now click ‘Save Converted File’ under ‘Home’ at the top left.
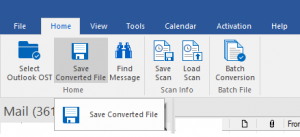
- From the Export Options, select ‘Export to Office 365′ and then click ‘OK’.
- Enter the user credentials i.e., Email ID and Password, and then click ‘OK’.
- This will immediately import the converted mailbox items from the OST file into Outlook 365 account.
The software also allows you to convert multiple OST files to PST format via the Batch Conversion option.
After conversion, you can create a CSV file to map and import the PSTs into Outlook 365 or Office 365 accounts as discussed in Step 2 in Method 1.
Difference between Manual and Automated Method
Below are the key differences between the two approaches to import OST files into Outlook 365.
| Manual Method | Automated Method |
| The lengthy process with multiple steps to import OST into Outlook 365 | Exports OST to Outlook 365 in a few clicks |
| Does not work when the OST file is inaccessible or orphaned | Converts inaccessible or orphaned OST files to Outlook importable PST files |
| Exports OST mailbox items to a single large PST file | Provides the option to split and save mailbox items into multiple PST files (based on date range and size) to avoid corruption and performance issue |
| Exports mailbox items from one Outlook profile or OST file to PST at once | Features batch conversion option to convert and export multiple OST files to PST format |
| No option to directly export OST mail items to Office 365 | Option to import OST mail items directly to Office 365 (Outlook 365) or live Exchange Server |
| Takes significantly longer time to export PST | Efficiently extracts and saves mailbox items from OST file to PST |
Conclusion
An OST file can’t be imported into Outlook 365 account as it is encrypted and binds to an Outlook MAPI profile. To import mailbox items from an OST file into Outlook 365, you must convert the OST file to PST format. This can be done via the Outlook Import Export wizard. However, the wizard works when Outlook profile and OST file is accessible. To convert and import inaccessible or orphaned OST files, you must use an OST to PST converter software, such as Stellar Converter for OST.
The software helps you skip multiple steps required to import the mailbox items from an OST file to Outlook 365 manually. It can directly import OST files into Outlook 365. All you need is valid user credentials of the Outlook 365 account. It also helps you convert multiple OST files to PST format via Batch Conversion. This allows you to migrate multiple OST mailboxes to Outlook 365 with minimal effort and time.